TRAINING GUIDE
The Complete Vertical Jump Guide: From Assessment to Personalized Training
The BounceLab pillar guide: assessment, readiness score, injury risk, strength deficit vs velocity deficit, plyometrics, technique and re-testing — linked to every supporting topic cluster.
A higher vertical jump is not built by one magic exercise — it is the product of a system: strength, power conversion, elastic ability, technique and recovery. Missing any link caps the others.
This guide walks the whole chain in the order that produces the most centimeters per hour, with the evidence and protocols used throughout the BounceLab knowledge base.
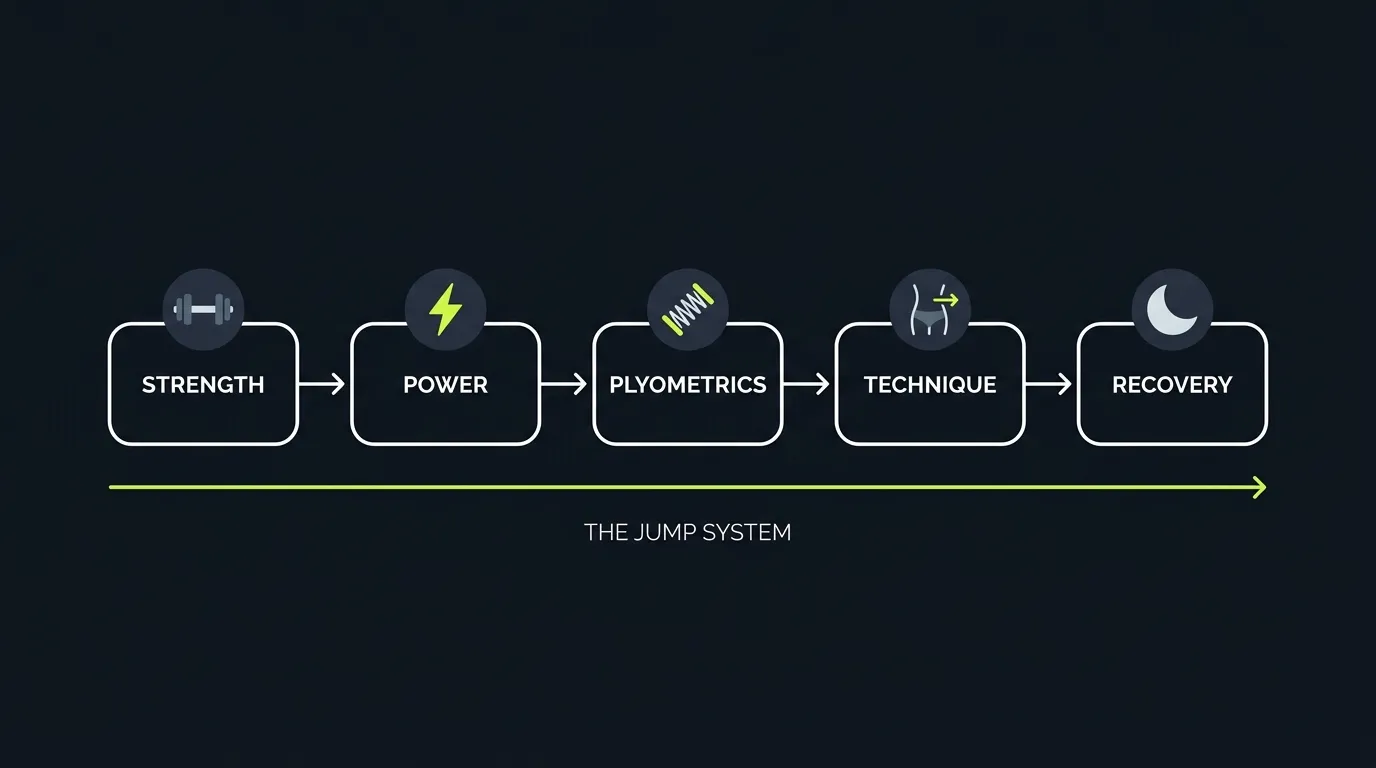
What actually determines vertical jump
Jump height is set by how much force your legs produce, how fast they produce it, how well the stretch-shortening cycle reuses elastic energy, and how efficiently your technique transfers all of it into vertical motion.
BounceLab turns those inputs into a jump profile: strength, power and speed, elasticity and reactive strength, coordination, stiffness and readiness. The evidence is clear that combined strength and plyometric training outperforms either alone — which is why this guide builds both in sequence rather than picking one.
Step 1 — Assess before you train
The fastest way to waste months is guessing. BounceLab offers three depths — Basic, Standard and Advanced — that produce a readiness score, priority weaknesses, an injury risk grade and a plan direction. If you prefer to test on your own, start with these measurements:
- Countermovement Jump (CMJ) vs Squat Jump (SJ) gap — tells you whether strength or elastic use is the bottleneck.
- Squat 1RM and relative strength — the foundation metric.
- Force-Velocity Profile (F-V Profile) once your squat is at least 1.5x bodyweight.
- Reactive Strength Index (RSI) and ground contact time if you have a contact mat or video.
- Approach reach if you play a sport that uses running takeoffs.
- A fixed weekly test protocol so changes are real, not noise.
Step 2 — Build the strength base
Plyometric gains are limited below roughly a 1.5x bodyweight squat. If you are below that, 6–8 weeks of strength emphasis — full squats, Romanian deadlifts, Bulgarian split squats — is the highest-ROI work available.
This is where a strength deficit is fixed: when your jump is already efficient but your force reserve is small, heavy strength raises the ceiling that every other quality converts.
Step 3 — Convert strength into power
Strength only helps the jump if it is expressed at speed. Loaded jump squats around 30% of 1RM, power cleans and contrast sets teach the nervous system to improve Rate of Force Development (RFD) — this is the step most athletes skip, and it is why squats go up without jumps following.
If you are strong but jump lower than expected, you are looking at a velocity deficit: keep strength on maintenance and shift work toward explosive and reactive qualities.
Step 4 — Add plyometrics
Once the strength base exists, add plyometrics with the standard entry criteria: 1.5x squat, no acute lower-limb injury, and clean landing control. Work from an intensity ladder — pogo jumps, box jumps, then depth drops and depth jumps — and keep quality contacts around 50–100 per session, twice a week.
Plyometrics train the Stretch-Shortening Cycle (SSC). Track Reactive Strength Index (RSI) and ground contact time when possible; short, quiet contacts are the quality gate.
Step 5 — Refine technique
Technique is the final few percent that cost nothing: the arm swing contributes 10–15% of jump height, a fast countermovement outperforms a slow deep one, and approach jumps need correct block-step placement. Film yourself and fix one cue at a time.
Coordination and stiffness are partly technique, partly training: countermovement depth, arm swing timing and landing mechanics all appear in the BounceLab technique score.
Step 6 — Recover and re-test
Sleep below 7 hours measurably lowers force output, and protein under 1.6 g/kg limits adaptation. Deload every 4–6 weeks, then re-test with the same protocol — changes beyond roughly 1–2 cm are real; everything smaller is noise.
Re-testing feeds the next plan. In BounceLab the loop is assessment → personalized plan → training log → jump tracker → re-test at the scheduled week.
The BounceLab entity map
Every major concept in this guide has a canonical home on the site. Use these entities as your navigation map:
- Countermovement Jump (CMJ) and Squat Jump (SJ) — testing protocol and bottleneck interpretation.
- Strength Deficit vs Velocity Deficit — deciding whether to lift heavy or train fast.
- Force-Velocity Profile (F-V Profile) — the full lab-grade version of the same diagnosis.
- Reactive Strength Index (RSI) and Ground Contact Time — the quality metrics for depth jumps and fast plyometrics.
- Rate of Force Development (RFD) — how quickly force rises in the first milliseconds of takeoff.
- Stretch-Shortening Cycle (SSC) and Plyometrics — the mechanism behind elastic jump performance.
- Injury Risk & Landing Mechanics — the safety layer that constrains exercise selection and volume.
- Progressive Overload & Periodization — how to sequence load, deload and re-test across blocks.
- Readiness Score — the weighted 0–100 profile that turns all of the above into one action plan.
Key takeaways
- Assess before you train: CMJ−SJ gap and relative strength set the direction.
- Know your bottleneck: strength deficit and velocity deficit require opposite priorities.
- Build to a 1.5x relative squat before expecting plyometrics to pay off.
- Convert strength into power with loaded jumps, RFD work and cleans.
- Add plyometrics with entry criteria, 50–100 quality contacts, twice a week.
- Re-test with the same protocol and feed the result into the next plan.
References
- Sáez de Villarreal et al. (2009) J Strength Cond Res — plyometric training meta-analysis
- Sánchez-Sixto et al. (2021) Sports Med
- Samozino et al. (2012) Med Sci Sports Exerc
- Jiménez-Reyes et al. (2017) Scand J Med Sci Sports
- NSCA Essentials of Strength Training and Conditioning (4th ed.), Ch. 18
- Verkhoshansky & Siff (2009) Supertraining, Ch. 6
Related articles
Strength Deficit vs Velocity Deficit: Which One Is Limiting Your Jump?
Two athletes can jump the same height for opposite reasons. Learn to tell a strength deficit from a velocity deficit, and train the right bottleneck.
CMJ vs Squat Jump: The Simplest Jump Bottleneck Test
The difference between your countermovement jump and squat jump reveals whether strength or elastic use is your limiting factor.
The Force-Velocity Profile: What It Is and Whether You Need It
The F-V profile tells you whether strength or speed is your bottleneck — and when you are not ready for it yet.
Depth Jump Technique: The Complete Guide
Box height, step-off vs jump-off, contact time, rebound direction and the common errors that turn depth jumps from a power tool into a injury risk.
What Is Plyometrics? A Safe Starting Guide
The stretch-shortening cycle explained, fast vs slow SSC, the NSCA entry criteria and low-intensity progressions for beginners.
How to Split Strength and Plyometric Training
Combined strength and plyometric training beats either alone. Here are the phase ratios, same-day ordering rules and common mistakes.
How to Track Jump Progress Scientifically
One standard test, fixed conditions, weekly frequency and the smallest worthwhile change — the protocol that turns jump data into decisions.
BounceLab vs My Jump, Vert Shock and JumpKit: How to Choose
A practical comparison of assessment-first training with BounceLab, measurement apps like My Jump, fixed programs like Vert Shock, and jump-testing hardware like JumpKit.
Key exercises
Barbell Back Squat
The king of strength training and an irreplaceable foundation movement for jump training
Jump Squat
The most direct vertical-power entry — explode from a shallow squat, then reorganize your posture after landing
Depth Jump
The gold-standard jump exercise — the depth jump maximizes SSC (stretch-shortening cycle) use, directly raising reactive strength and jump height
Box Jump
The first-choice entry to plyometrics — the box jump teaches fast force production and coordinated landing, a cornerstone of jump training
Power Clean
Pull the bar explosively from the floor to the front shoulders (caught in a quarter squat)
Countermovement Jump (CMJ)
The standard vertical jump — from standing, dip into a quick countermovement and immediately jump as high as possible with a full arm swing