Patellar Tendinopathy (Jumper's Knee): Prevention & Rehab
The #1 injury in jump training, explained: why the tendon overloads, evidence-based prevention and the four rehab phases from isometrics to return.
The patellar tendon connects the kneecap to the shin and can take 8–12x bodyweight during a single jump. Repeated exposure at that load makes it the most common overuse injury in jump athletes.
The good news: both prevention and rehab are well researched. The bad news: both require patience and progressive loading, not rest alone.
Modern terminology matters: this is tendinopathy — a load-capacity problem — not 'tendinitis'. The suffix matters because the treatment is loading, not anti-inflammation.
Why it happens
Patellar tendinopathy is a load-capacity problem. When weekly jump volume, intensity or poor technique outpaces the tendon's ability to adapt, the tendon becomes painful and reactive.
Evidence-based prevention
Prevention is training management, not magic:
- Increase weekly plyometric volume by no more than 10%.
- Build posterior-chain strength — strong hamstrings and glutes share the patellar load.
- Warm up thoroughly and stretch the quads after sessions.
- Avoid large jump volumes on concrete.
- Add isometric prehab: wall sits 3×45s, 2–3 times per week.
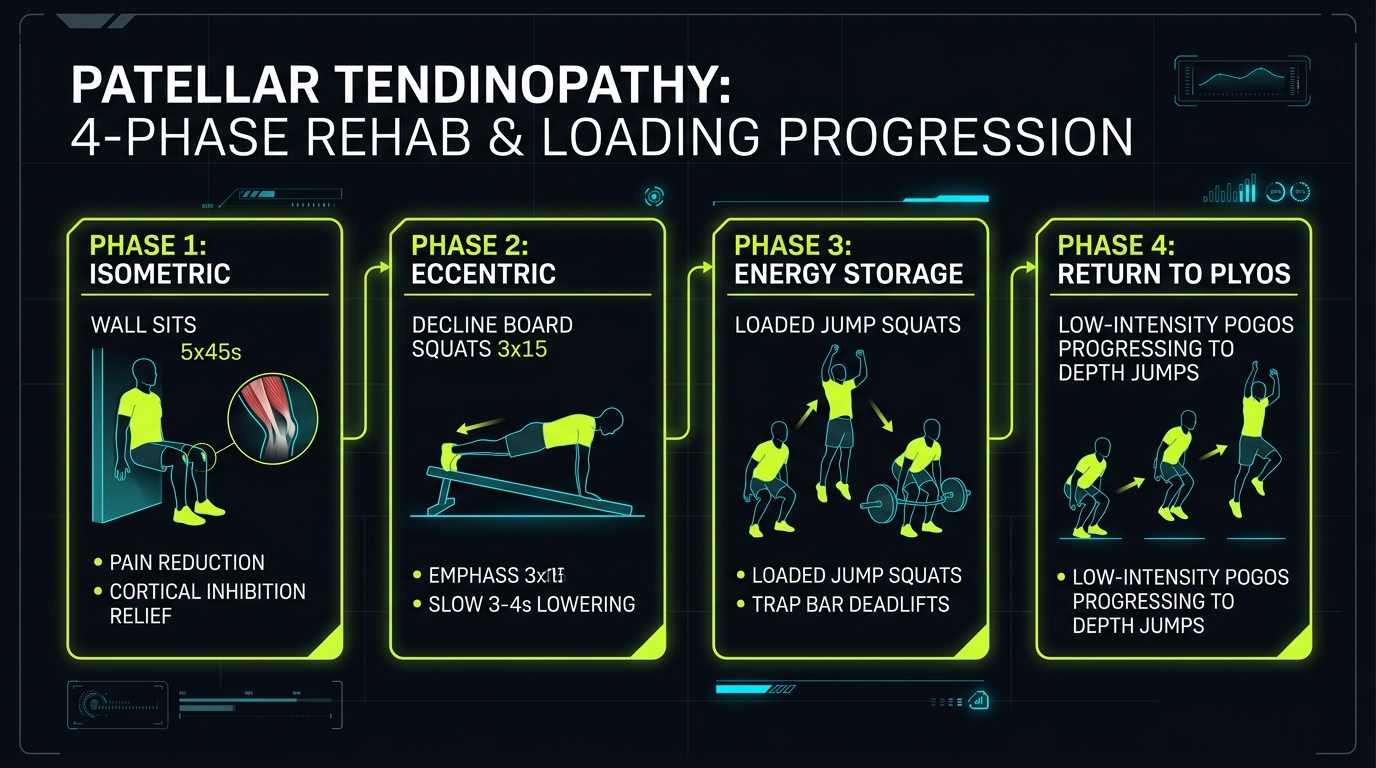
The four rehab phases
Treatment follows a staged loading progression with pain kept at or below 3–4/10:
- Phase 1 – Isometric: wall sits 5×45s, twice daily, to reduce pain.
- Phase 2 – Eccentric: decline-board eccentric squats 3×15 with a slow 3–4s lowering.
- Phase 3 – Reloading: progressively restore full training load.
- Phase 4 – Return: low-intensity plyometrics, then gradual intensity.
When to see a professional
If pain has not improved after 3+ months of consistent loading work — or if it is sharp, sudden or accompanied by swelling — stop guessing and get a professional assessment.
The load-capacity model
Patellar tendinopathy develops when tendon load exceeds the tendon's current capacity. The critical insight is that unloading makes capacity drop further: rest alone rarely fixes a load problem, because the tendon needs progressive loading to rebuild.
This is why rehab is staged — isometrics first to manage pain, then eccentrics and reloading to restore capacity — with pain used as the dosing guide.
Pain monitoring rules during rehab
Use pain as a dosage meter, not an all-or-nothing signal:
- Pain during exercise should stay at or below 3–4 out of 10.
- Next-morning pain should be no worse than before the session.
- Soreness should settle within 24 hours.
- Sharp pain, joint pain or swelling means stop that exercise.
Return-to-jump criteria
Before returning to jumps, you should have a week of pain-free isometrics and roughly symmetrical strength between legs. Then climb a plyometric ladder — pogo jumps, low box jumps, depth drops, depth jumps — over 2–4 weeks, adding a level only when the previous one is pain-free.
If pain returns at any level, drop back one step and rebuild, rather than pushing through.
Key takeaways
- The patellar tendon absorbs huge loads; volume jumps of ≤10% per week protect it.
- Isometrics are the pain-management phase; eccentrics rebuild capacity.
- Progress only while pain stays ≤3–4/10.
- 3+ months without improvement means professional input.
- Treat it as a load problem — rest alone makes the tendon weaker.
- Judge pain the next morning, not only during the session.
Related calculators
References
- Malliaras et al. (2015) Br J Sports Med
- Harris et al. (2020) J Orthop Sports Phys Ther
- Rudavsky & Cook (2014) Br J Sports Med
- PubMed: Patellar tendinopathy rehabilitation
Keep reading
REHAB & INJURY PREVENTION
Shin Splints: What to Do and How to Prevent Them
Medial tibial stress syndrome: acute management, the strength and surface fixes that prevent it, and the red flag that means see a doctor.
REHAB & INJURY PREVENTION
Returning to Training After an Ankle Sprain
Grades, timeframes and the functional return criteria that matter more than the calendar — plus the staged path back to jumping.
REHAB & INJURY PREVENTION
Good Pain vs Bad Pain: How to Tell the Difference in Training
Muscle soreness is normal; joint pain and movement-changing pain are not. Here is the classification used in sports medicine.
Related exercises
Isometric Wall Squat
The #1 patellar-tendon health movement for jump athletes — isometric wall sits load the tendon controllably without excessive joint movement
Single Leg Balance
The foundation for preventing the #1 jump injury (ankle sprain) — single-leg balance rebuilds proprioception and ankle stability, the safety prerequisite for all single-leg jumps
Eccentric Heel Drop
The #1 Achilles-health insurance for jumpers — eccentric heel drops (Alfredson Protocol) are the gold standard for Achilles rehab; the eccentric load stimulates tendon repair